
I’m a big fan of embedding animated gifs in, like, everything. In my opinion, blog posts, tutorials, GitHub issues, tweets, and really, any online medium can occasionally stand to benefit from a quick gif.
I create a lot of these gifs, so I thought I’d share my routine for actually building these things, as I’ve tried several different workflows before ending up with something I like. The tl;dr is I work on a Mac; I use QuickTime to record my screen; and I use a little command-line script to convert the QuickTime-recorded .mov file into a .gif file. If that sounds interesting read on.
QuickTime
I start by opening QuickTime and selecting its File –> New Screen Recording option:
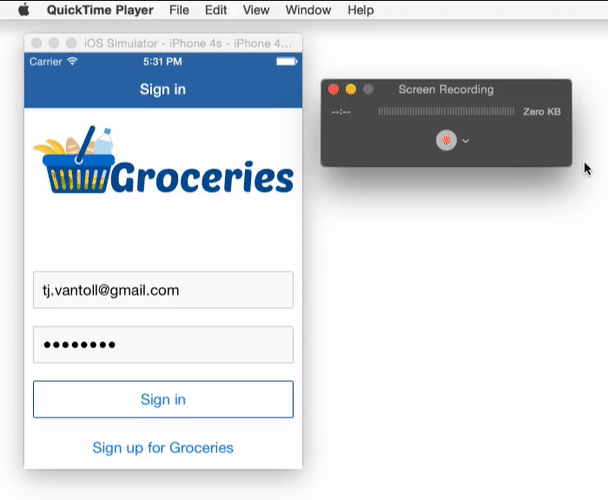
Next, I select the area of the screen I want to record. For instance, in the gif below I select a section of the iOS simulator, and then hit Start Recording.
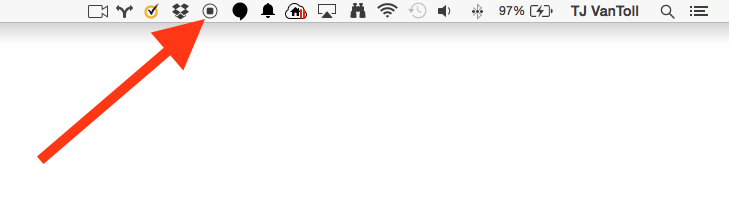
Once I’ve recorded what I’m interested in showing, I click the stop button in the menu bar to end the recording:
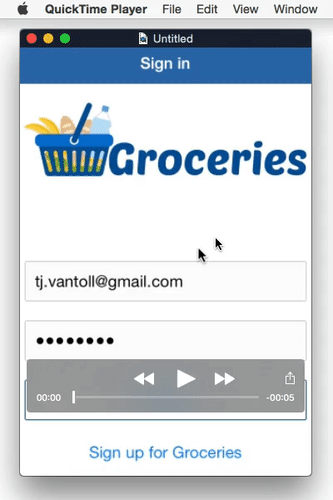
After QuickTime pops up the completed recording, I use QuickTime’s Cmd + T command to trim off the bits at the beginning and end:
After I trim off the edges, I use File –> Save to save the movie as a .mov file. From there the movie is ready for a gif conversion.
I find that this simplistic editing is sufficient for ~95% of the gifs I create. On the rare occasion I need to do some more advanced editing, I use ScreenFlow to prepare the video file.
Giffify
There are a number of tools for converting movie files into gifs, but I’m a fan of a quick little command-line script I stumbled upon several weeks ago by Sebastiano Poggi:
Personally, I like saving the script above at ~/dev/giffify.sh, as that’s where I tend to dump these type of utility scripts. The script depends on the ffmpeg command-line utility, so before using the script you have to install FFmpeg first.
There are a few different ways you can install FFmpeg, but I find the easiest to be via Homebrew:
$ brew install ffmpeg --with-fdk-aac --with-ffplay --with-freetype --with-frei0r --with-libass --with-libvo-aacenc --with-libvorbis --with-libvpx --with-opencore-amr --with-openjpeg --with-opus --with-rtmpdump --with-schroedinger --with-speex --with-theora --with-tools
All the
--with-*flags are optional, and to be completely honest with you I don’t know what the vast majority of them are. I include them all because I occasionally need to create gifs from a variety of movie file types.
Putting it all together
Now that I have a QuickTime-recorded .mov file, and Giffify available at ~/dev/giffify.sh, I can now use the script to create gifs. For example, assuming I have ios.mov at ~/Desktop/ios.mov, I can create ~/Desktop/ios.gif using the following command:
$ ~/dev/giffify.sh ~/Desktop/ios.mov ~/Desktop/ios.gifHere’s what that gif looks like:
![]()
The Giffify script allows you to pass a height as the script’s fourth parameter. I tend to use this option whenever I’m concerned about the file size of the generated gif. As an example, I can make a 200px-tall version of the gif above with the following command:
$ ~/dev/giffify.sh ~/Desktop/ios.mov ~/Desktop/ios.gif 200And here’s what the smaller version of the gif looks like:
![]()
And… that’s it. It you have any questions about my workflow feel free to ask in the comments, or share what has worked for you.