
I really like React Native, but after reading a Beginner’s Guide to Using CocoaPods with React Native by Gant Laborde, I wanted show just how much easier the same task is in NativeScript.
If you’re curious, start by reading through Laborde’s article. It’s well written, but a quick skim of the content shows the inherit difficulty of the task: there are a half dozen manual Xcode steps, some .m and .h files to create, and dozens of lines of Objective-C to write—which isn’t exactly trivial for your average JavaScript developer like me.
In NativeScript we spent a lot of time trying to optimize this exact use case for your average JavaScript developer. We feel that leveraging third-party iOS and Android frameworks—such as CocoaPods for iOS—is essential for building high-quality native applications, and that these libraries should be just as easy to use as JavaScript libraries from npm. To show that in action let’s look at how to use the JTSImageViewController CocoaPod in a NativeScript app.
Note: Laborde’s React Native article assumes you know the basics of React Native, so I’ll be assuming you know the basics of NativeScript as well. If you don’t have the NativeScript CLI installed, or you don’t know the basics of how to start and run a new app, you may want to go through the official NativeScript Getting Started Guide before continuing.
Building a plugin
In NativeScript you use CocoaPods (and native SDKs in general) by wrapping them in a NativeScript plugin. We have thorough documentation on creating NativeScript plugins and using CocoaPods in particular, but the basics are really simple.
To mirror the React Native article we’ll create a NativeScript plugin named “image-preview”. Start by adding the folder structure below to any existing NativeScript project:
image-preview/
    ├── package.json
    └── platforms/
        └── ios/
            └── Podfile
Next, paste the following code into the image-preview/package.json file, which gives the plugin a name, a version, and defines what NativeScript versions the plugin supports:
{
  "name": "nativescript-image-preview",
  "version": "0.1.0",
  "nativescript": {
    "platforms": {
      "ios": "1.5.0"
    }
  }
}
Next, paste the following line of code into your image-preview/platforms/ios/Podfile, which tells NativeScript this plugin will use the JTSImageViewController CocoaPod:
pod 'JTSImageViewController'Finally, run the tns plugin add command from the root of your NativeScript project to install the plugin in your app:
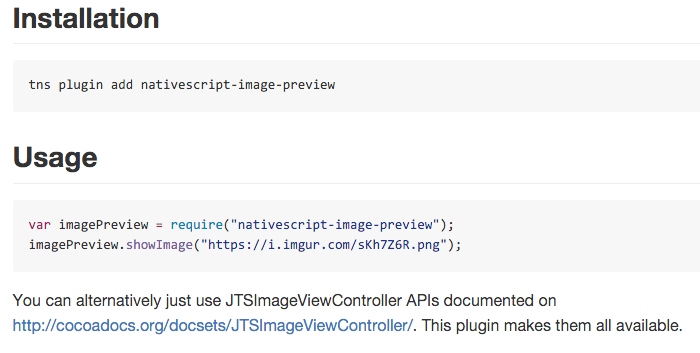
tns plugin add ./image-previewAnd with that the CocoaPod is installed and ready to use in your app.
Using the plugin
One of NativeScript’s best known features is our JavaScript to native bridge that makes native APIs available in JavaScript code. Because of that bridge, once the plugin is installed, you can just use any of JTSImageViewController’s documented APIs directly; there’s no need to do anything in Xcode.
Note: For a bit of background on how NativeScript makes it possible to use native APIs in JavaScript code, you can read my previous article for How NativeScript Works. You can also refer to our docs for specifics on accessing native APIs, as well as intricate details on how we bridge iOS APIs and JavaScript code.
To again mirror the React Native article, the simplest possible way to get the CocoaPod running in your app would be with the following code. You can just copy and paste this into any of your NativeScript app’s JavaScript files:
var frameModule = require("ui/frame");

var imageInfo = JTSImageInfo.alloc().init();
imageInfo.imageURL = NSURL.URLWithString("https://i.imgur.com/sKh7Z6R.png");

var imageViewer = JTSImageViewController.alloc().initWithImageInfoModeBackgroundStyle(
    imageInfo,
    JTSImageViewControllerMode_Image,
    JTSImageViewControllerBackgroundOption_Scaled
);
imageViewer.showFromViewControllerTransition(
    frameModule.topmost().ios.controller,
    JTSImageViewControllerTransition_FromOriginalPosition
);
Regardless of whether you use React Native or NativeScript, the actual code that hits the native layer is going to be the hardest for JavaScript developers to write. In React Native that code is 30+ lines of Objective-C, and in NativeScript it’s the ~14 lines of JavaScript above.
Although NativeScript’s JavaScript code here is admittedly a bit arcane, from personal experience I can say that converting iOS APIs to NativeScript is not nearly as bad as it looks at first glance. And the key here is you get to keep all of your code in JavaScript, which is advantageous for a number of reasons, such as not needing to shift contexts between multiple languages, the ability to reuse existing JavaScript tooling such as linters, and the ease of wrapping these iOS APIs with a far-easier-to-use JavaScript API.
Tip: It’s also worth noting that NativeScript has first-class support for TypeScript, which optionally lets you write NativeScript plugins in TypeScript—giving you Xcode-like benefits of code autocompletion and syntax checking for these iOS APIs.
For instance, to make these iOS APIs easier to use let’s create the showImage() method that the React Native article uses. Start by adding an index.ios.js file to your plugin, which gives you a convenient place to define your plugin’s JavaScript API:
image-preview/
    ├── index.ios.js <---- file goes here
    ├── package.json
    └── platforms/
        └── ios/
            └── Podfile
Then, paste the following code into your index.ios.js file:
var frameModule = require("ui/frame");
exports.showImage = function(url) {
    var imageInfo = JTSImageInfo.alloc().init();
    imageInfo.imageURL = NSURL.URLWithString(url);

    var imageViewer = JTSImageViewController.alloc().initWithImageInfoModeBackgroundStyle(
        imageInfo,
        JTSImageViewControllerMode_Image,
        JTSImageViewControllerBackgroundOption_Scaled
    );
    imageViewer.showFromViewControllerTransition(
        frameModule.topmost().ios.controller,
        JTSImageViewControllerTransition_FromOriginalPosition
    );
}
This is the same code as before, just wrapped in a showImage() function.
Note: NativeScript uses the CommonJS
exportskeyword for defining a JavaScript module’s API, and the CommonJSrequire()method for bringing in other JavaScript modules.
Now that this file is in place you can use that same require() method elsewhere in your code to leverage this new plugin:
var imagePreview = require("image-preview");
imagePreview.showImage("https://i.imgur.com/sKh7Z6R.png");
Now, anyone that uses this plugin doesn’t need to know about the JTSImageViewController APIs at all. They just require() this JavaScript module and call showImage().
Distributing the plugin
The last piece of the puzzle is how to actually distribute the plugin for others to use. In NativeScript plugins are stored on npm, and earlier today I posted the image preview plugin from this article up on npm, and put its source code on GitHub.
The full set of instructions for using this plugin shows off just how powerful NativeScript’s plugins are. All you have to do to use the plugin is run tns plugin add, and then call the plugin’s documented APIs.
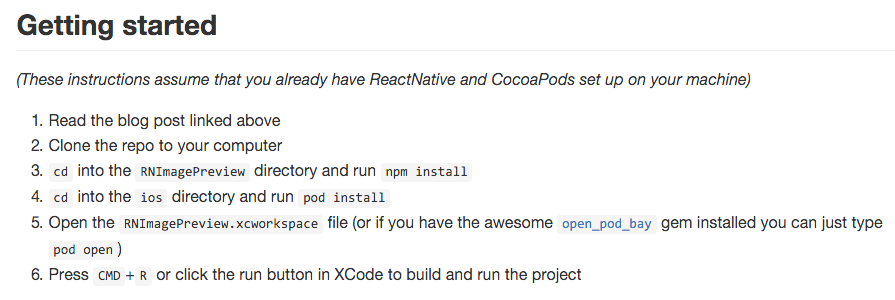
This stands in stark contrast to the same React Native code, which is also up on GitHub, and which takes significantly more manual steps to get started with:
All in all, it’s my belief that CocoaPods—and native SDKs in general—are significantly easier for JavaScript developers to use in NativeScript versus React Native. There are fewer manual steps; there’s no need to know Xcode in and out; and it just feels right to stay in JavaScript and npm during development.
I’ll add two disclaimers though. First, I’m obviously biased here, and it’s quite possible that I’m missing something that makes this process a lot simpler for React Native developers. If that’s the case, please let me know in the comments.
Second, I’m not by any means saying that NativeScript is a better framework because it handles this feature better. NativeScript and React Native each have their pros and cons, and the best choice for your next project depends on how each of those matches up with your, or your company’s, development style and project needs. If you’re about to embark on a nontrivial project, I’d encourage you to take some time to evaluate your options before moving forward. If you’d like to evaluate NativeScript, I’d encourage you to take a few hours and go through our Getting Started Guide to see what you think.